Replacing the aerator on a kitchen faucet is a straightforward process that can improve water flow and reduce splashing. Here are step-by-step instructions:
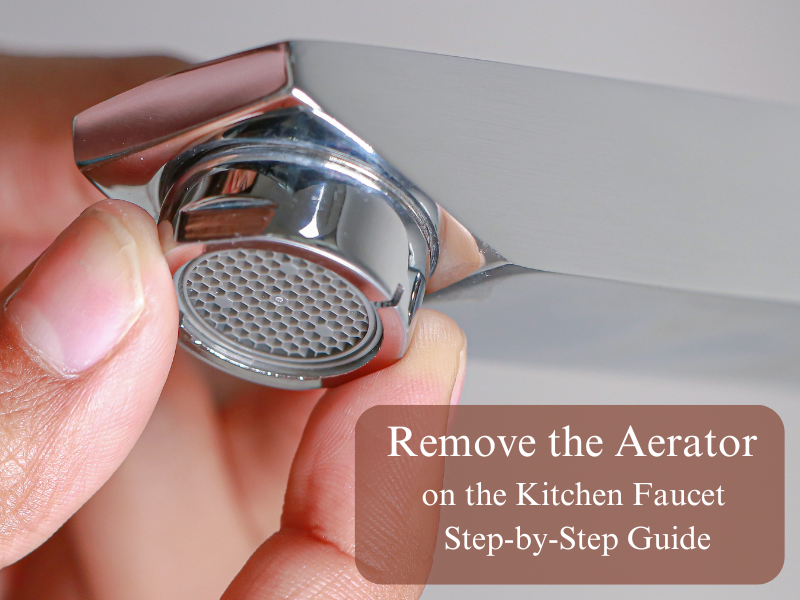
To replace the aerator, first close the faucet and allow it to dry. Then, turn the aerator counterclockwise. Use your fingers to turn the collar counterclockwise. If you're having difficulty gripping the collar, dampen a washcloth and hold it over the collar for better traction as you turn.
Next, install the new aerator by securely screwing it in place, ensuring all components are properly aligned and the mesh side faces downwards.
Slide the aerator gasket onto the aerator within the faucet collar, ensuring the hole side faces upwards towards the gasket, as it will only function properly with the gasket in place.
Complete the assembly by screwing the aerator around the mouth of the faucet in a clockwise direction. Avoid over-tightening. Finally, test the faucet by opening it to ensure proper functionality.
For more details you can read the blog: How to Change the Aerator on Kitchen Faucet